


A dreamy full bathroom DIY makeover for less than $3K
This bathroom was a labor of love, and I can’t believe how well it turned out. I took an awkwardly disproportionate space with a rusty tub, peeling wallpaper, and cracked tiles to the cozy dark green bathroom of my dreams. Here it is before:


I started by gutting the room, being sure to keep the tub and sink safe for future reuse. With the help of my sister, I removed the moldy window A/C unit and the dusty ceiling fan, demoed the floor tile, and peeled off the already-peeling wallpaper (the result of decades without an exhaust fan). My plumber then cleaned up and reinforced the subfloor with cement board, my electrician installed a through-the-wall exhaust fan, and my carpenter restored the two wood windows.
Meanwhile, I used a wire scrubber attachment on my drill to clean the peeling paint off the clawfoot tub, primed it with Zinsser BIN, painted it Benjamin Moore Black Panther, and sealed it with Minwax Polycrylic.


Then, it was time for me to get started on bringing the room back to life. I painted the walls and ceiling Benjamin Moore Backwoods, a dark cozy evergreen, and installed beadboard 1/3 of the way up the wall and painted it the same. I used a matte finish on the walls and ceiling and satin on the beadboard, trim, and window sashes.

I used Benjamin Moore Backwoods on the ceiling, walls, and trim.
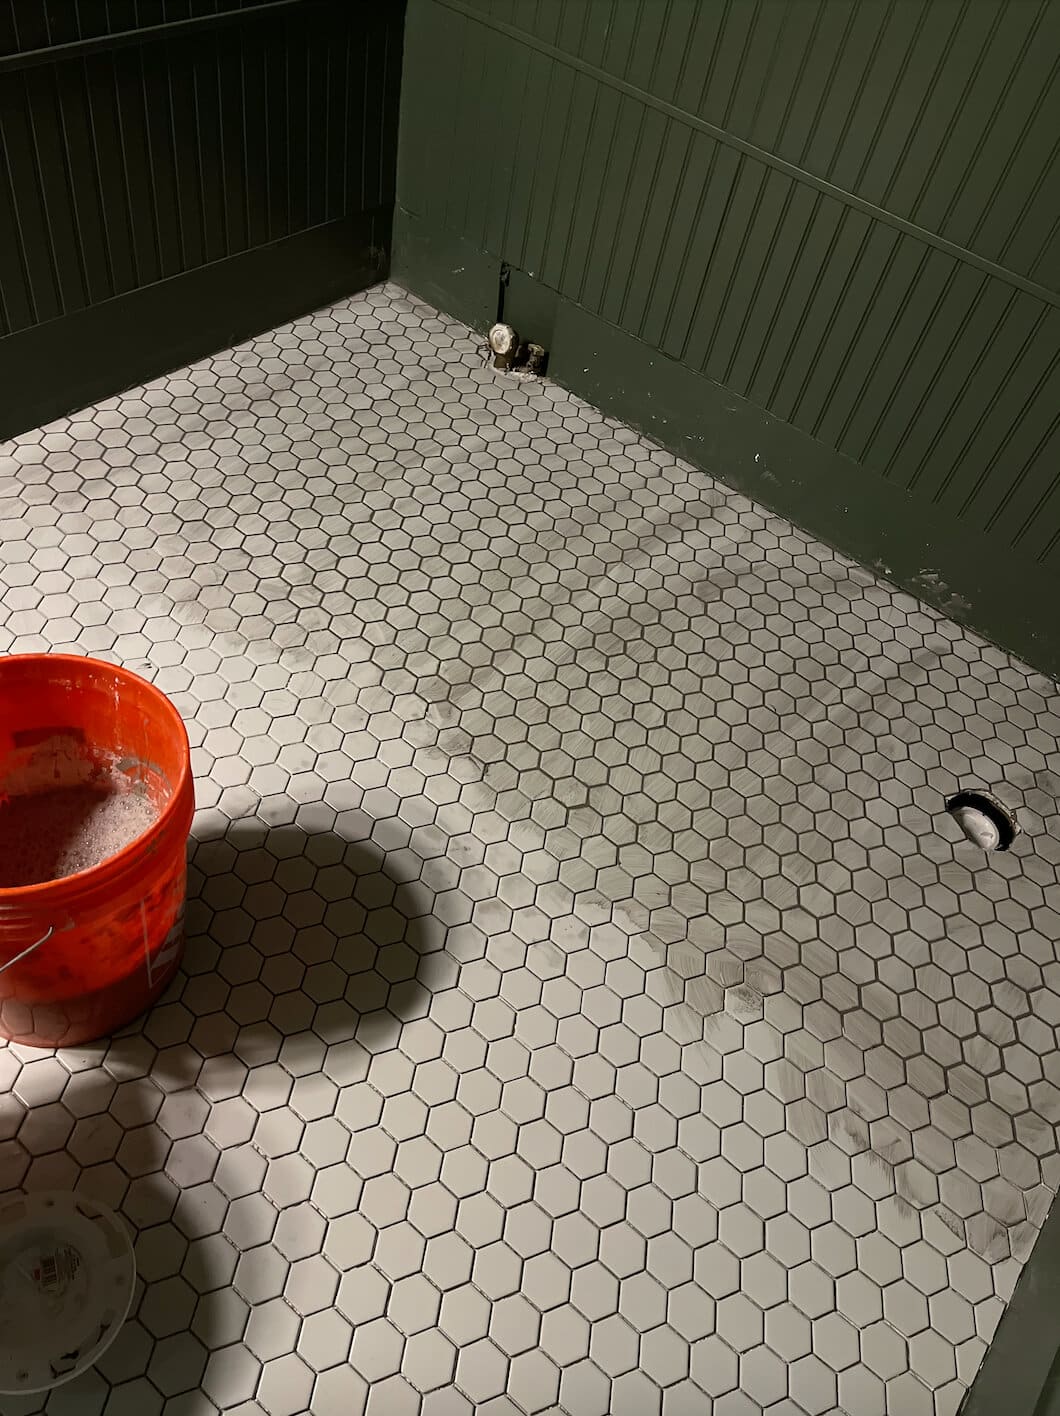
Next, I embarked on my first tiling adventure. I used an affordable 2-inch white hex tile and learned the hard way that mosaic tiles don’t work with traditional spacers and you have to eyeball correct spacing. Quite the challenge for a first-time tiler! But I made it through, thankfully. I used a neutral gray grout called Delorean Gray for some nice contrast and added shoe moulding for a clean edge.

I purchased custom roman shades from Select Blinds in the fabric White Canvas and also used Artscape Old English window film for added privacy. It’s extremely realistic looking and fools almost everyone—they think it’s real leaded glass!

My plumber then installed the new toilet (high efficiency AND soft-close—gotta love it!), and I got the clawfoot tub and sink back in place and all hooked up. I decided to keep the sink hardware but spray painted it with Rustoleum Antique Brass to match the original window and door hardware. I even Rub N Buffed the toilet hardware to take it from chrome to antique brass. It’s all in the details! I also painted the exhaust fan and A/C vent covers to match the walls for perfect camouflage. To make sure the paint sticks, be sure to prime with Zinsser Cover Stain first.


The clawfoot tub shower conversion was the trickiest part of this room. The ceilings are very high—almost 12 feet—and traditional clawfoot shower rings only extend down about 3 feet from the ceiling. Extending the shower rod up 9 feet was just not going to work. So I constructed my own shower ring out of 1″ PVC pipe that I spray painted flat black. And it worked! I then used a clawfoot shower liner long enough to wrap the entire tub to prevent water from escaping and three shower curtains that overlap to look continuous. I hemmed the bottoms to perfectly skim the floors with no-sew Heat Bond tape. I then installed curtain holdbacks to swag the curtains away from the tub.

Clawfoot shower hardware can also get extremely expensive. I saw many packages that cost around $1K. Instead, I did a LOT of research and cobbled together my own version from a seller on Amazon. I used this shower system with a clawfoot tub adapter, a shower rod extension, and a wall mount extension. In total, this kit only ended up costing a couple hundred dollars.
Finally, I got to the finishing details. I rehabbed an old bookshelf I found in the mudroom by painting it Benjamin Moore Black Panther and lining the back of the shelf with Dark Walnut-stained cedar shiplap I had leftover from another project. The shelf adds necessary storage to the room while also hiding the toilet from immediate view.


On the shelf, I placed a basket filled with eco-friendly and locally-made bath products, and a cute grid-patterned box for feminine products. I bought an old blue apothecary jar at an antique store that I filled with Epsom salts and surrounded with essential oils for guests to create their perfect bath, and bought fluffy white towels and dedicated makeup towels for guests. Last, I added some thrifted art, a wooden tissue box holder, and glass canisters that I filled with cotton swabs and balls for guests.


For the toilet area, I found an unopened wall-mounted toilet paper holder for just a few bucks at Goodwill! And I placed pressed eucalyptus sprigs (a few bucks at Trader Joe’s) in floating frames, also found at Goodwill.
There are a couple of tricky bits about converting a clawfoot tub to a shower. For one, there’s no easy storage solution, which is why I was so happy to find these shower caddies that attach to the shower rod by tension. I also added a wooden bath tray I thrifted at Goodwill for a bathtime ledge. Second, clawfoot tubs can be slippery and hard to get in safely. That’s why I added anti-skid clear tape to the bottom of the tub and bought a safety step for guests who want some extra help climbing in.

For the sink area, I found a great swivel mirror that works for guests of any height, an industrial-meets-traditional vanity light, and a nice traditional towel ring. I topped the sink with insanely good-smelling tobacco & bay leaf hand soap and a cut crystal highball glass for toothbrushes or rinsing that I thrifted at Goodwill for a couple bucks.

For the finishing touches, I used a multicolor runner in front of the tub as a bath mat. I love how it ties in all of the colors of the room and its decor. My friend Tasnim also gifted me with an amazing rubber plant that fits in the room perfectly, which I placed on this beautiful solid walnut plant stand.

And last but not least, one of my favorite details in the room is the modern black and antique brass chandelier. It’s the perfect length for this super tall room and brings the lights down to an appropriate level to brighten the shower area. Plus, it just looks super cool.

For those who are as budget-obsessed as I am, here’s the full breakdown:
Wainscoting + trim ~$200
Paint ~$100
Tile $224
Grout + mortar $94
Shower system + curtains + accessories $534
Toilet $430
Lighting $27 + $224
Mirror $43
Towel ring $12
TP holder $4
Shower ring PVC parts ~$40
Rug $26
Window privacy film $48
Roman shades $348
Towels $80
Other decor ~$60
Exhaust fan $238
Plant stand $30
Full reno + decor cost: $2762 

I love what you’ve done, its a fabulous job and a big learning journey I bet. Oh and green is my favourite colour so a double star from me 💚💚