
Ah, demo day—a thrilling yet potentially chaotic phase of any renovation project! My projects usually call for delicate demo, but my kitchen renovation was a gut job, and my sister and I learned a LOT during the process. So from managing debris to ensuring safety, here are my 10 top tips for navigating your first DIY demo day like a pro.
This post may include affiliate links, which means I may earn a small commission if you click on the link and/or purchase from that site. I use that money to keep this blog running. You can read my full disclosure policy here.
1. Rent a dumpster or dumpster bag

With demo day comes lots of debris! You’ll want a place to dump and contain all of your demo material while you’re working.
You can either rent a dumpster, or what I prefer is to use a dumpster bag service like Bull Bag or Bagster. Once the bag is full, you simply schedule and pay for pickup service online, and a truck will show up, take your debris, and return your bag for future use.
2. Rent or buy proper demo tools


My sister and I thought we’d be able to take out all of the cabinets with some elbow grease and an electric screwdriver. But surprise! Those cabinets could have survived an explosion they were so sturdy.
So I had to bring out a tool I’ve never used before: my reciprocating saw. How did I know to use it? Because I’ve seen folks on HGTV use them when doing demo 😂
And slowly but surely, it worked! Be prepared to get creative, and keep your tools handy. Here’s a list of the 10 tools I’d recommend you have on hand for demo day.
3. Prep for dust control


I hadn’t taken as many precautions with dust control in the past, and dust always carried so easily into surrounding rooms. But for the kitchen demo, I used magnetic dust barriers on all of the doors leading to the kitchen and set up an air filter and box fan hack that sucked most of the dust out of the air as it was created.
This made a huge difference both in the air quality in the kitchen during demo and in preventing dust from spreading. The only dust I noticed afterward outside the room was what we tracked out via our shoes and debris!
4. Set aside clean water and snacks
The kitchen demo took much more time and effort than we’d expected, and we had to haul out debris to the dumpster bag in 100+ degree heat. We took frequent breaks and hydration was key, of course, but we’d also stocked up on a bunch of cookies from my favorite bakery to snack on. When I have to slog through something unpleasant, I like having little treats to reward myself. Plus, the cookies gave us a sugar boost before we headed back in to tackle more demo.
It doesn’t have to be cookies, but find something that will help incentivize you and keep your energy up when you take breaks.
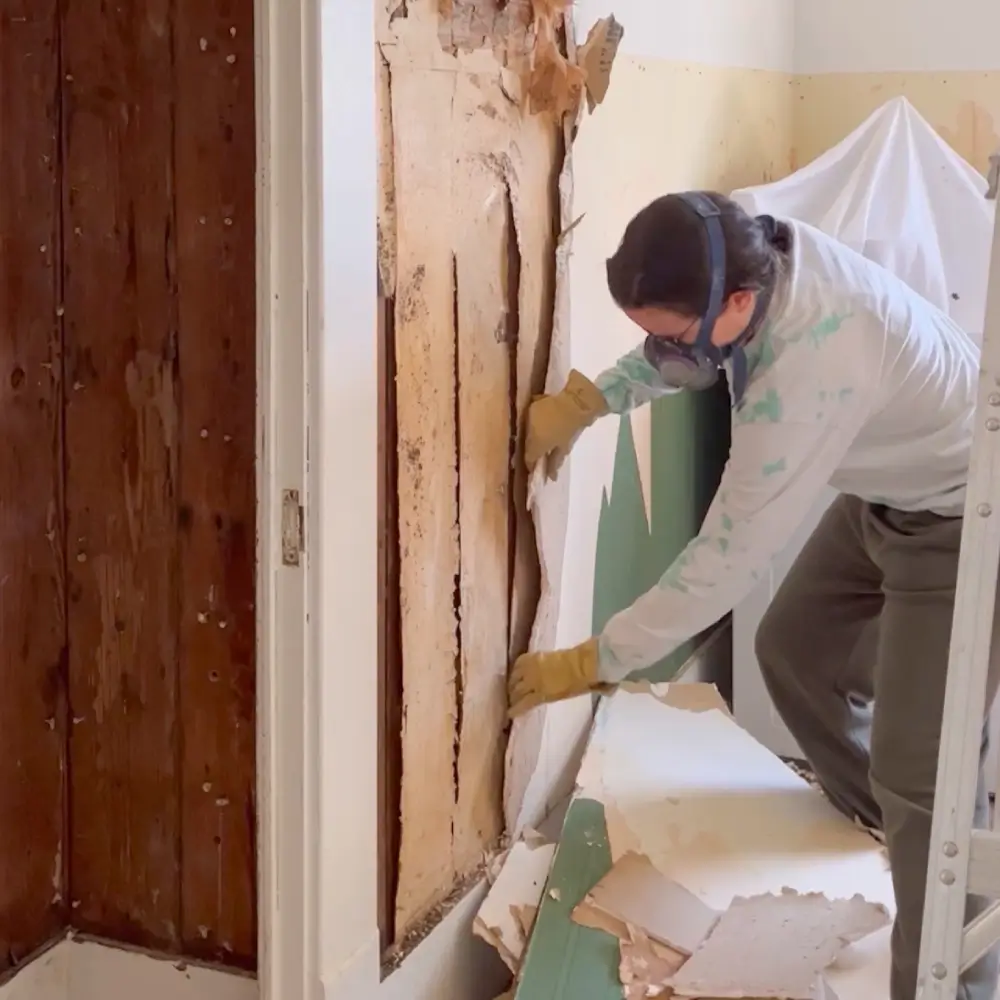
5. Wear PPE

This is probably the most important demo day tip I can give! Aside from just the amount of dust that will be in the air, you never know what might happen on demo day. You could step on a nail, splinters could fly toward your eyes, or you may stir up harmful substances like lead or asbestos.
So I always recommend that you at least wear closed-toe shoes, a respirator or mask, glasses, and gloves. I also wear my over-ear headphones for ear protection, and after demo I immediately shower and wash my clothes to lower the risk of contaminating clean rooms.
6. Shut off the water

We didn’t do this, but I wish we had! We had a couple of close calls where I had to saw right up to the sink water lines to remove the base cabinets. Then later we had a piece of debris swing down from the ceiling and knock into the sink plumbing. Fortunately it only broke off the P-trap, but it could have been much worse!
So learn from my mistakes and shut off your water main and drain your pipes before you get started with demo.
7. Shut off the electricity

You never know what you’re going to find while you’re knocking out cabinets and walls. For example, we found a ton of wiring running through the upper cabinets themselves. If we’d hit one of those while it was “hot” with a metal tool, we’d be goners!
So before you ever get started, head to your breaker box and shut off all of the circuits that feed into the room. If that leaves you without enough light, use a shop light that’s plugged in from another room.
8. Delicate demo when you can

It’s fun to watch people on HGTV kick through walls and chop up cabinets, but that’s not always necessary or desirable! If you can salvage anything that you think someone else may want—even just cabinet knobs—it’s better than them ending up in the dump.
Plus, delicate demo is less dusty. When you remove things gently by unscrewing them rather than breaking them apart, you’re less likely to create dust, debris, and dangerous situations. Unfortunately in my kitchen there wasn’t much that could be delicately removed, but I was at least able to donate the appliances.
9. Clean up as you go

If you let your debris accumulate in the room, it will create a safety hazard, so I like to dispose as I go. That way no one is tripping over rusty nails while holding power tools.
The easiest way to keep the room clean is to have a designated corner for debris. Buy contractor trash bags, which are much thicker than normal trash bags and can contain sharper materials without tearing. When a bag gets full, take a break, haul it to your dumpster, and start filling a new bag.
10. Expect the unexpected


I knew the kitchen cabinets were poorly built and we’d probably find lots of outside gaps that led to the kitchen’s consistent roach problem. But what I wasn’t expecting was that the cabinets were SO poorly built that they didn’t contain a single screw. Where the builder could have used one screw, he used four nails instead. This doubled if not tripled the amount of time and effort the demo took. My sister and I were very sore by the end.
So always budget more time than you’d expect—you never know what you’ll find once you start!
I hope these demo day tips are helpful to you! If you’re looking for more guidance as you work on your home, check out my course DIY Renovation for Beginners.
