
Wood beadboard ceilings are beautiful, but how do you install them? And how much do they really cost? I’ve broken down the process step by step for you with subtotals, materials I recommend, and tips and tricks for installation. Without further adieu, let’s get into it…

Project supply list
This post may include affiliate links, which means I may earn a small commission if you click on the link and/or purchase from that site. I use that money to keep this blog running. You can read my full disclosure policy here.
- 12-foot beadboard planks
- Water-based wood conditioner
- My favorite water-based stain
- Water-based sealant
- Brad nailer
- Construction adhesive
- Caulking gun
- Rubber mallet
- Support cable
Step 1: Measure your ceiling and order your boards


First up, you need to figure out how many beadboard planks you’ll need to cover your ceiling. But before you can do that, you must choose the orientation of your planks. If you have plank flooring, the most aesthetically pleasing option is to run the ceiling planks in the same direction as the floor planks.
If that length of ceiling is less than 12 feet long, good news! You can use 12-ft beadboard without any visible seams on your ceiling. If it’s longer than 12 feet, you will need to install multiple planks back to back, similar to how flooring planks are butted up against each other. I suggest staggering the joints randomly across the ceiling so that your joints aren’t always in the same place, similar to how you would install hardwood flooring.

Then you need to figure out how many planks you need to cover the rest of the ceiling. Measure the length of that side of the ceiling and divide it by the width of the planks. BUT keep in mind that while the stated width of the planks is 3.125″, this includes the length of the tongue on the tongue and groove paneling. You do not want to count the tongue length, as it will be embedded in the groove of the adjacent board. If you divide your ceiling length by 3.125″, you will accidentally order too few boards. Instead, divide by 2.75″ just to be safe, and order extra in case some arrive too warped or twisted to use.
If you have a large truck, you can pick these boards up from the store yourself. But keep in mind that since they are made from pine, which is a soft wood, they can bend and warp easily. Try to store them as flat as possible. Otherwise, you can get them delivered from the store for a fee.
My parents’ bedroom ceiling needed 53 beadboard planks to cover it, and I paid for delivery.
Cost for me: $591.56
Step 2: Stain or paint your planks

If you plan to stain or paint your planks, I highly suggest doing so before install. Painting ceilings is hard enough, let alone a ceiling that has hundreds of grooves. So save yourself the hassle and do this ahead of time. If you insist on doing it later, I suggest using an airless sprayer.

My dad wanted a stained wood ceiling, so I started by coating the planks in a water-based wood conditioner and then used my favorite water-based stain in the shade Colonial. Then, I sealed the boards with matte polycrylic, but I went over it later with satin polycrylic because I felt it needed more sheen. It took about one quart of each product to cover all of my 53 planks.
Cost for me: $65.27
Step 3: Install a support cable


If you plan to install the planks by yourself, or if you just want to make it easier as a team, I highly suggest that you install a support cable along one side of the ceiling to hold one end of each plank up while you’re working. If you’d like, you can install a cable on each side of the ceiling to make it even easier.
You can fill and sand the holes the cable creates later, or I chose to install mine high enough that the drop of the crown moulding later covered it.
Cost for me: $10.81
Step 4: Plan your first plank

When working with wood, it’s always important to consider expansion and contraction. Wood likes to expand when it’s warm and humid, and it contracts when it’s cold and dry. So it’s always recommended to leave what’s called an “expansion gap” on the edges of your install.
The gap should be at least 1/4″ but not so wide that you can’t cover it later with crown moulding. I chose about 1/2″ just to be safe. If you don’t install an expansion gap and your wood expands and doesn’t have anywhere to go, your ceiling planks may buckle instead.
All that said… make sure to install your first plank at least 1/4″ from the edges of the ceiling.
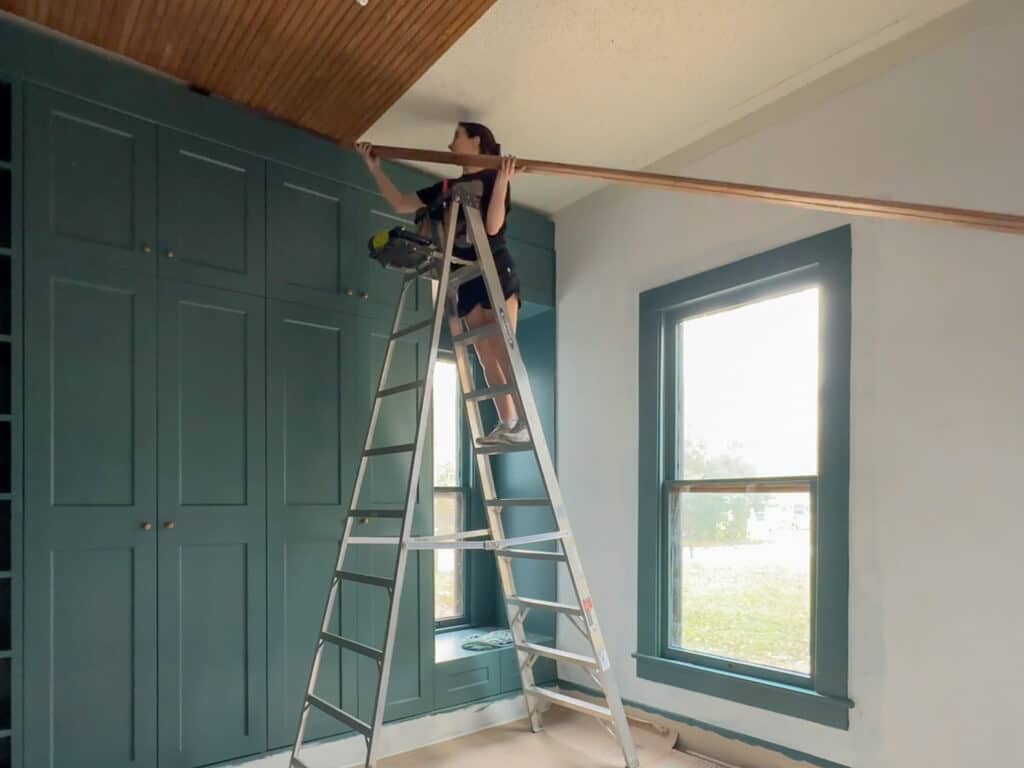
Step 5: Install your ceiling planks


When it comes to installation, you’ll want a brad nailer with 2″ brads and construction adhesive applied with a caulking gun on the backs of your planks.
I installed this ceiling in a 1915 home with solid wood above the drywall, so I could shoot my nails wherever I pleased. But if you have a more modern ceiling with just drywall and studs, you’ll need to use a stud finder to mark all of your studs before you begin to ensure that you’re shooting into the studs.
Another method I’ve seen for installing planks on a studs ceiling is to take big long wood boards, run them along the studs, and screw them into the studs securely. Then, you have a wider wood target for shooting your nails into as you install the planks. Just note that this method will drop the ceiling slightly.

If you’re having trouble slotting the tongue of one plank into the groove of the adjacent plank, try whacking it in with a rubber mallet. If the tongue only goes into the groove on one side but no matter hard you try it won’t slot into the other side, it may be because the plank is warped. At that point, accept defeat, remove the plank, and try a new one.
I did not fill the brad nail holes because the 12-foot ceiling was too high to notice them, but if they bother you, you can spackle and touch up with paint if you’re painting, or use a color-matched wood filler if you’re staining.
Cost for me: ~$17
Step 6: Cover the gaps with crown moulding

To finish up your ceiling, install your crown moulding or other top trim to cover up the expansion gaps on the edges. If you stained your beadboard planks, you can use a color-matched caulk between the beadboard and the crown moulding to seal the gap. If you painted, you can use a paintable caulk and then cover it with touchup paint.
For this step, I re-used the existing crown moulding in this room that I removed at the start of the room renovation.
Cost for me: $0

Total beadboard ceiling cost: $684.64
I hope this guide was helpful to you! I plan to plank another ceiling in my parents’ home, but I’ll be testing out a new ceiling install method, which I hope will be easier. When I do, I’ll be sure to share a comparison of the two methods here for you.
PS: If you want to learn how to use power tools and gain the skills to tackle your own renovations, check out my course DIY Renovation for Beginners.
