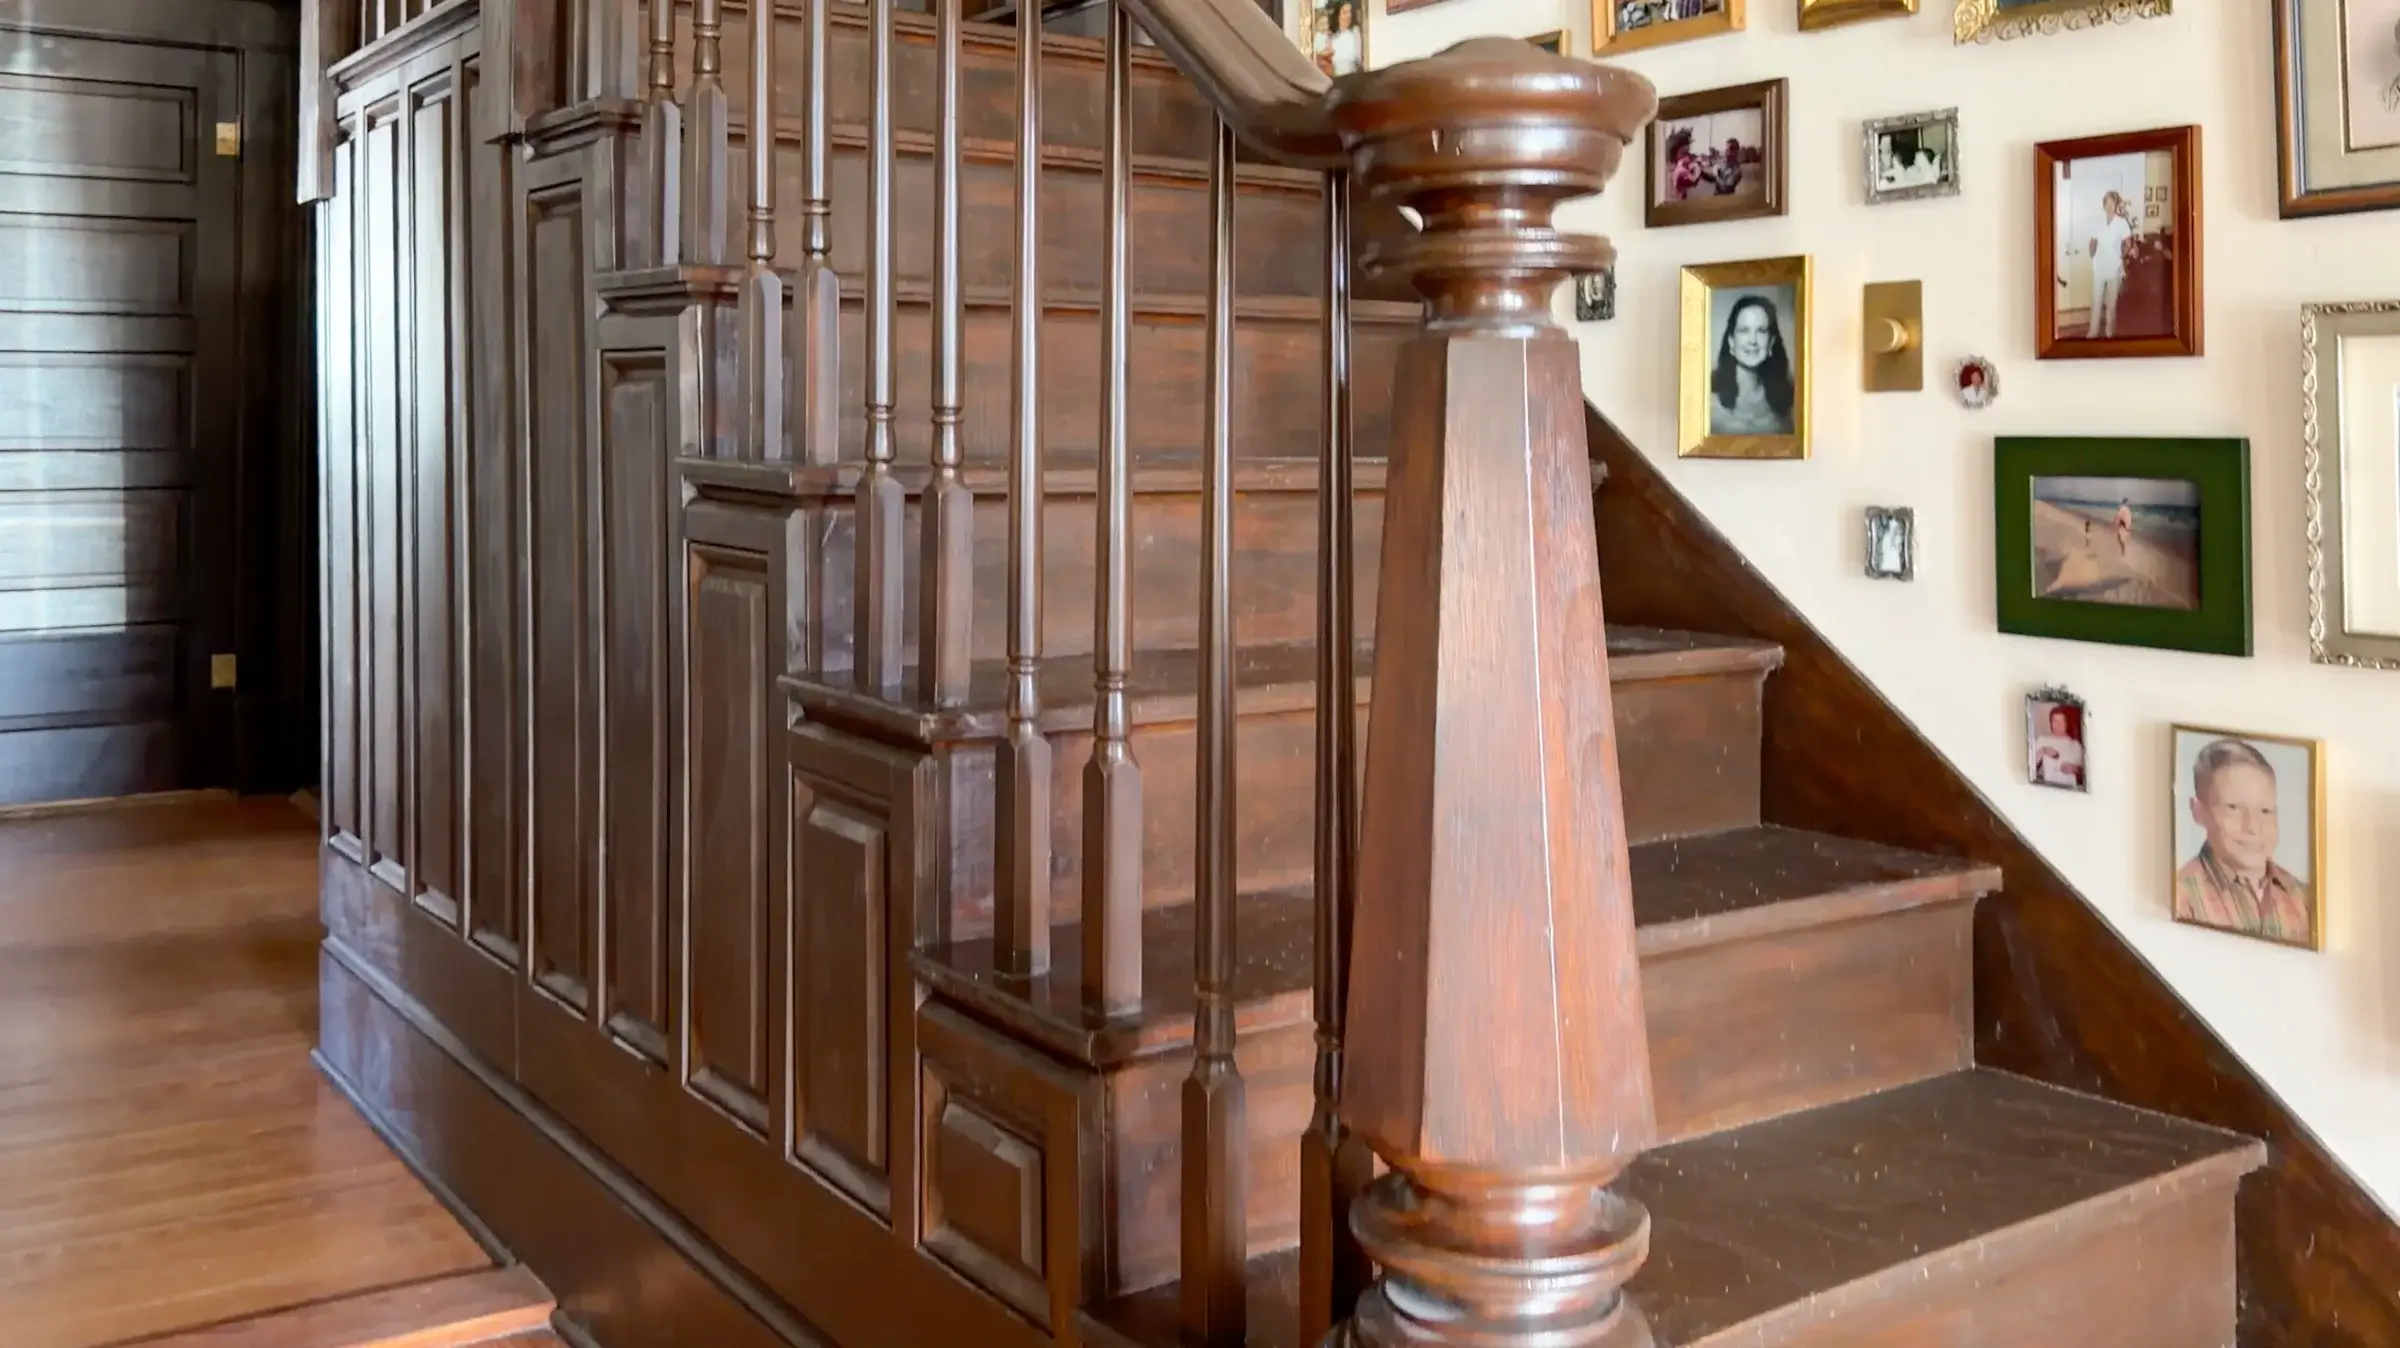

If you have a staircase with blank sides and want to make it look like a traditional ornate paneled staircase, you’re in the right place! When I bought my 1914 Craftsman home, it had a staircase inside that was added in the 1990s and made to look like a Craftsman staircase… to a point. And that point was the textured drywall on the side of the stairs, which screamed “90s renovation”. So here is a step-by-step tutorial on how I added raised wood paneling to my staircase to make it look more traditional…
Project supply list
This post may include affiliate links, which means I may earn a small commission if you click on the link and/or purchase from that site. I use that money to keep this blog running. You can read my full disclosure policy here.
- Plywood for backer board
- Construction adhesive
- Caulking gun
- 3/4″-thick boards (I used select pine, various widths)
- Base cap moulding
- Stud finder
- Painter’s tape
- Small level
- Miter saw
- Table saw
- Router
- Chamfer bit
- Jig saw
- Brad nailer
- Wood filler
- Wood conditioner
- Stain (I used 50% Dark Walnut, 50% Antique Walnut)
- Sealant
- Paint brush
- Staining sponges
- Measuring tape
- 180-grit sandpaper
- Tack cloths
Step 1: Prep the staircase side for paneling


Your stair stringer, the wood part that you see zig-zagging along the side of the stairs, is likely not flush with whatever material the wall is made of. In my case, there was a 1/4″ difference between the textured drywall surface and the surface of the stringer. Yours may be 1/2″ or 3/4″ off from each other, but before you can start paneling, the surfaces need to be flush.
Start by removing any trim that touches the wall surface. In my case, this meant prying off the baseboard. Then, use a stud finder to locate your studs behind the drywall and mark them up on the stringer with pieces of blue painter’s tape.


Then, apply a backer board that makes up for the difference in depth between your wall and stringer surface. In my case, this was 1/4″-thick plywood, which I cut to follow the angle of the wall using a circular saw, but you could also use a jig saw. Apply construction adhesive to the back of each piece and then nail in place with a brad nailer into the studs, which you marked with blue tape.
Now you have a flat surface to work with for paneling.
Step 2: Install the baseboard and base cap


Now that the wall is flush, we can add trim back in. You can either reuse your old baseboard or, in my case, I used unfinished select pine boards that could be stained. I also had to use a multi-tool to trim away 1/4″ of the floor transition to make up for the addition of the 1/4″ plywood and allow the baseboard enough room to fit. Nail your baseboard into the studs, following your painter’s tape marks.
Then, install base cap moulding on top of the baseboard. The widest edge of the base cap should touch the top of the baseboard, with the narrow edge facing up.
Step 3: Install the bottom board for the paneling


Measure the distance between the top of the base cap moulding and the bottom of your second step. This will be the width you need to cut your bottom board down to with a table saw. After cutting, dry fit the bottom board in place to ensure a perfect fit.


Then it’s time to smooth the transition between the bottom board and the base cap trim below it by adding a chamfered edge to the bottom of the board. Use a router and a chamfer bit with a 1/2″ cutting diameter, moving from left to right along the bottom edge of the board. Smooth any roughness along the chamfered edge with 180-grit sandpaper, and then nail in place along the studs. Be sure that the chamfered side is down against the base cap trim, with the straight edge facing up.
Step 4: Install the vertical stiles


Now, it’s time for paneling! The top left image shows you the rough structure of the vertical panel that will go under each stair step. I experimented with two different styles of base cap and ended up going with the top version, which I felt looked more cohesive.
Looking at the layout above, the leftmost piece is where we’re starting: the vertical stiles. For these, I used more select pine boards, ripped down on my table saw to 1-1/8″ wide. Be sure to sand the edges of every piece you cut to remove saw marks and roughness. To determine the height of each stile, measure the distance between the top of the bottom board and the bottom of each step. You will need one stile per step.


Once you get your measurement, cut the stiles down to height with a miter saw. My stairs were also unique in that the bottom of each stair step had cove moulding wrapped around underneath it, so to smooth the transition between the top of the stile and the cove moulding, I added a chamfered edge. If your stair step has no trim underneath it, your stile can just dead-end into it without the need for chamfering.


Then, nail your stiles in place along the front edge of each stair step. Use a small level to make sure you’re keeping each stile perfectly straight the whole way down. At this point, you won’t be able to only shoot nails into studs. The stair stringer and backer board should be sturdy enough to lock your nails in, but if your stiles can still wiggle after you nail them, try applying a small bead of construction adhesive to the backs first before nailing them in.
Step 5: Install the top rails


Measure the width between adjacent stiles to find the length of your top rail, and cut more 1-1/8″-wide pieces to length with a miter saw. Remember that in my case, I had to chamfer the top edges of the stiles to run into the cove moulding under my steps, so I also chamfered the top edge of the rail to do the same.
Always dry fit your pieces in place first before you nail them in to ensure that each piece fits perfectly. Even small gaps between pieces are not your friends with this project. “Seamless” is the goal.
Step 6: Install the base cap moulding


Base cap moulding will line all four sides of the panel boxes you’ve created, with the wide edge of the base cap touching the stiles and rails and the narrow edge facing in. Use a miter saw to cut your base cap corners at 45-degree angles so that the pieces perfectly meet in each corner.
Dry fit all of your base cap pieces in the panel boxes before you nail them in, making sure that everything has a snug fit with no visible gaps. Then, nail them in.
Step 7: Install the raised panels


Measure the inside dimensions of each panel box to find the width and height of each raised panel that will fit inside. Cut a board to width on a table saw and then to height on a miter saw. Then, use your router to add a chamfered edge to all four sides of the front of the panel. Smooth down any rough edges or router marks with 180-grit sandpaper.


Dry fit your raised panels in the boxes to ensure a perfect fit. Then, nail in place to secure.


If you have any intrusions into your paneling—in my case, the bottom of a stair post—you will need to get a little creative. Note how the stiles, rails, and base cap just dead-end into the post, and I had to cut a notch out of the raised panel with my jig saw to fit.
Step 8: Fill, sand, stain & seal your trim


Now that your paneling is complete, it’s time to paint or stain. But first, you’ll need to fill all of nail holes in your work. If you’re staining, you should use wood filler. If you’re painting, you should use spackle. Then, carefully sand everything smooth with 180-grit sandpaper.
If painting, you should use a high-quality primer that blocks the tannins of the wood from bleeding through your paint. If staining, you need to water pop your wood first by running a wet but not soaking rag all over the surface of the wood. Wait for it to dry completely, and you will notice that the wood now feels rough to the touch. This is called “raising the grain”. Then, sand it smooth with 180-grit sandpaper. This method ensures that your wood will remain smooth, even after you apply stain.
If you’re using wood that’s difficult to stain like pine, be sure to apply wood conditioner right before staining to prevent blotchiness. You can use oil-based stain, but I find water-based stain to be more forgiving, especially when trying to stain tricky pine. This is my favorite low-odor stain, and I used a 50/50 mix of Dark Walnut and Antique Walnut. I suggest applying the stain with a brush to get in all of the nooks and crannies and quickly running over it with a staining sponge to remove streaks. Be very careful to catch drips as they happen, and don’t be discouraged if the first coat looks rough. The stain evens out with additional coats.
Finally, seal with multiple coats of polycrylic. I like the matte version, which still gives a soft sheen. Use the brush and staining sponge method again, being very careful to catch drips before they dry. Sand very lightly with 320-grit sandpaper with the grain along flat surfaces likes the stiles, rails, and panels in between coats, and remove dust with a tack cloth. This will ensure an ultra-smooth, shiny finish.


Congratulations—you now have a beautiful paneled staircase!
Want to learn how to tackle more home projects and use power tools with confidence? Check out my course DIY Renovation for Beginners.
