
My parents’ back porch has a concrete slab full of big cracks, including some that have shifted so that either side of the crack is on a different level. The size of the cracks range from long and wide to small and hairline, and I set out to fix all of them.


I did my research online and learned of two different fillers that professionals and DIYers alike use to patch concrete cracks: self-leveling concrete sealant and concrete patch compound. So, I set out to test them against each other to see which is the winner…

Project supply list
This post may include affiliate links, which means I may earn a small commission if you click on the link and/or purchase from that site. I use that money to keep this blog running. You can read my full disclosure policy here.
- Pressure washer
- Backer rod
- Sand
- Plastic putty knife
- Self-leveling sealant
- Caulking gun
- Ready-mixed concrete patch
- Set of brushes
- Orbital sander
- Fast-setting concrete
Step 1: Clean and prep your concrete

No matter the type of concrete patch you choose to use, you need to start out first with a clean concrete slab. That means trying to get up as much dirt, mildew, and grime as you can because they will prevent your concrete patch from adhering properly.

The easiest way to do this without expending a ton of energy and elbow grease is to use a pressure washer. This doesn’t need to be the highest PSI pressure washer on the market—you can get a less expensive lower PSI model that works for general cleaning, and that will get the job done. You don’t need a spotless surface, but you do want to remove most of the grime on your slab.
Be sure to spray inside the cracks, too, to remove the crud stuck inside as well as any leaves or other debris that may prevent your concrete patch from adhering as well as it should.
Step 2: Fill gaps with backer rod and sand

This is one of those steps that may seem trivial but is very important. Even if a concrete crack looks small on the surface, as it goes down into the slab it may grow wide and deep. That means that if you use a patch that’s very liquid-y like a self-leveling sealant, it will just continually fall down into the gap below, wasting product and time.
To prevent this from happening, take backer rod (aka caulk saver) and shove it down into the larger cracks on your slab. Since my parents’ porch slab had quite a few large cracks, I opted for 1/2″ backer rod. For cracks that were narrower, I took my scissors and cut the backer rod down the middle to DIY a 1/4″ backer rod.

Backer rod is just a long cylinder-like piece of foam that you can shove in cracks to serve as a “backer” for sealants like caulk so that you don’t waste as much product—hence, “caulk saver.” The trick with backer rod is that you need to shove it down below the surface of your crack so that when you apply your sealant later, the rod doesn’t peek through. To shove the rod down, I used a small putty knife. It’s a time-consuming process, but it’s worth it in the end.

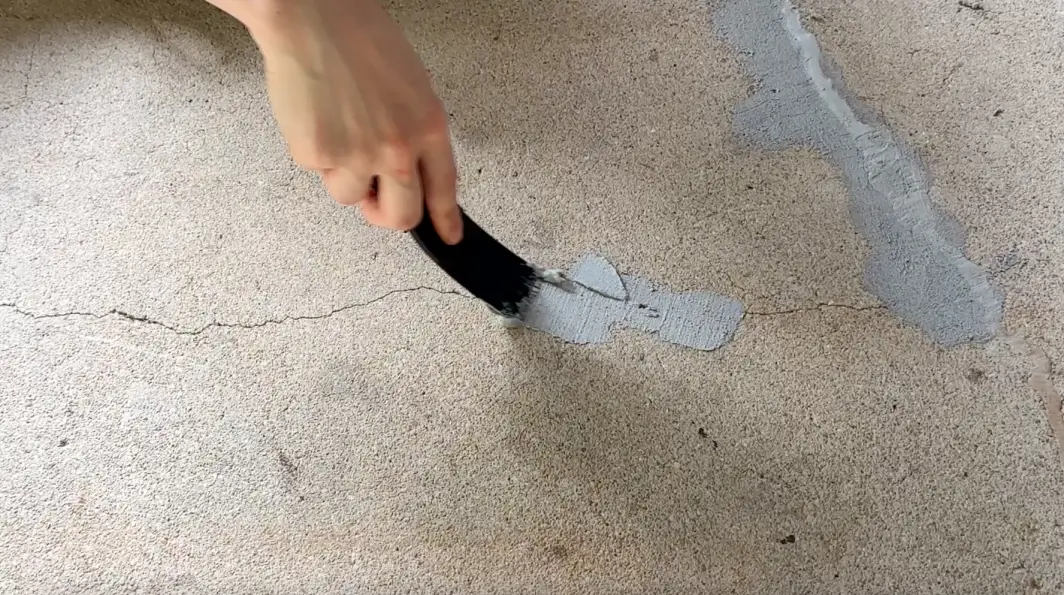
If you want to be extra safe, you can also sprinkle sand over the cracks after you’ve applied your backer rod. This is also a great solution for cracks that are too small for backer rod on the surface. Simply sprinkle the sand over the cracks and use a dry paintbrush to help it settle into the cracks and fill any remaining gaps. The trick here is that you don’t want the sand to extend all the way to the surface of the crack.

After the sand has settled, take your dry paintbrush and remove any excess sand from the top. You’ll want to see the top inner edges of both sides of the crack so that your sealant still has concrete on both sides to grab onto.
Testing self-leveling concrete sealant

I read a lot of favorable reviews for using self-leveling concrete sealant (more like a caulk) rather than patching compound (more like a grout). The benefits of the former are similar to caulk, which is that it allows for better expansion and contraction over time as your concrete slab shifts. I was sold! So here’s how I applied it…
First up, make sure you buy the size of tube that will fit your caulking gun. In my case, this was the 10.1 oz tube. If you buy the 29 oz tube, you will need to buy a larger caulking gun to dispense it. Also ensure that your concrete slab has dried for at least an hour after getting wet before applying the sealant.

Snip off the tip of the sealant tube and use the rod on your caulking gun to puncture the seal inside the tube. This is a very important step because if you just load up the tube in your caulking gun and start squeezing but haven’t punctured the seal, you’ll build up high pressure inside the tube. When you finally realize your mistake and pop the seal, the high pressure will cause the very liquid-y sealant to start spewing out. Don’t ask me how I figured that out…

Then, load up your tube in the caulking gun and start applying the sealant to your cracks. You’ll notice that it has a very thin consistency, which is what allows it to self-level easily. I did notice that the tube itself has a higher resistance than caulk tubes, which prevents you from accidentally squeezing too hard and dispensing a ton of the liquid-y sealant at once. So keep that in mind and move slowly and steadily, dispensing just enough to sit in the crack.
This is where things started to backfire for me. I noticed a couple of problems as the sealant began to dry:

1) The sealant puddled and settled above the surface of the cracks, leaving obvious raised lines over all of the cracks. To fix this, I used a glass scraper blade to whittle off the raised parts. This didn’t leave a perfect finish behind, so I ended up smoothing this out with the second concrete patch I tested.

2) The sealant doesn’t work well for cracks on two different planes, like when a slab has shifted and one side is higher than the other. All of the product will flow down to the lower side of the crack and puddle there. I ended up fixing this with the second concrete patch I tested.

3) The sealant itself has a shiny plasticky look to it, even when dry, making it stick out like a sore thumb on the concrete. I planned to solid stain the whole slab, so this wasn’t a big concern of mine. But if I wasn’t, I’d definitely want to sprinkle some sand on the sealant before it was completely dry to help it blend into the concrete more.
I then did some further digging online and found that the brand itself primarily promotes using its product for filling horizontal joints between concrete slabs and keeping the sealant below the surface of the joints. This makes more sense to me, as it’s less likely to look so unnatural as it does when it fills jagged cracks.

Pros of self-leveling sealants:
- Liquid-like formula settles into cracks without leaving air pockets that may lead to cracking later on
- Higher elasticity allows for joint movement
- Resists cracking and shrinking
- Water immersible after cure
- Ideal for filling horizontal joints between concrete slabs
- Paintable
Cons of self-leveling sealants:
- Either settles below the surface of the crack or puddles above it—it’s hard to find that Goldilocks sweet spot where it sits right at the surface of the concrete
- Dries with a shiny, plasticky finish that doesn’t blend well with concrete
- Doesn’t work well for cracks where one side of the crack is higher than the other
So would I recommend using self-leveling sealant for jagged concrete cracks? Not so much. I can see how it would be a great solution for filling the horizontal gaps between slabs, especially if you sprinkled a little sand on top to disguise the sheen, but I don’t see how it’s a good-looking solution for jagged cracks. But if you care less about aesthetics and just want a flexible filler that can better handle expansion and contraction over time, then this may be the better option for you.
Testing concrete patch compound

At this point I was frustrated with the results of the self-leveling sealant, so I turned to the next most popular option: a pre-mixed concrete patch compound. This product comes in a plastic tub like pre-mixed grout for tiling, and I found that the application was similar. The texture definitely feels like it has elastic qualities in it—it feels a bit more springy and bouncy as you’re applying it—but it doesn’t have as much flex as the sealant, so keep that in mind.
Because this product is thick and buildable, you can also use it to bridge gaps between cracks on different planes and even glue down loose pieces of concrete. It’s very versatile. If you can spread peanut butter, you can work with this compound. I liked it so much that I also used it to feather out the edges of the self-leveling sealant lines to make them less obvious.

First up, open your can of compound and take a look to see if the mixture has started to separate. You’ll be able to tell if there is a puddle of liquid on the top. If so, you’ll need to mix your compound before applying it. You can either use a drill with a mixer attachment or just some elbow grease. Check that your concrete is dry before applying.
Once your compound is mixed up, use a small flexible plastic putty knife to squish it into your cracks. You could also use a metal putty knife, but it will sound like nails on a chalkboard. After you squish product into the crack, run your putty knife over the top of the crack to remove excess.

Then, turn your putty knife perpendicular to the crack and start rubbing the knife back and forth along the surface of the crack as you move from one end of the crack to the other. This will remove the remaining excess and help to blend the filler out.

If you want to blend the filler even more, especially if you’re working on textured concrete, take a dry paint brush and brush it over the crack in the direction of the concrete texture. If there is no texture, brush it perpendicular to the crack to avoid removing too much filler. This will help to feather out the filler and blend it into the surrounding texture to make the patch less obvious.

I also like that the texture of the patch compound is sanded and therefore feels more similar to concrete. I did find that it had a little bit more roughness than my concrete in some areas, so once it was dry, I ran my orbital sander with some 60 grit sandpaper over it to help smooth it down.
Pros of concrete patch compound:
- Similar rough texture and flat sheen to concrete
- Extremely moldable and blendable
- Can be used for a variety of concrete fixing applications
- Has a little bit of flex to it
- Resists shrinking
- Paintable
Cons of concrete patch compound:
- More prone to cracking as your concrete expands and contracts
- Texture may be visibly rougher than your concrete
Self-leveling concrete sealant vs. concrete patch compound?


If you care more about aesthetics than flexibility, concrete patch compound is the clear winner. And for this project, that’s exactly what I wanted: to make these jagged ugly cracks look as seamless and invisible as possible under my solid concrete stain. If there are some cracks in the future that I need to touch up, I won’t mind it.
But if you care more about how well the sealant will hold up to expansion and contraction over time, or if you’re simply filling horizontal gaps between slabs, self-leveling concrete sealant will be a better option for you.
What is the best thing to use to fill cracks in concrete?
If you’re filling horizontal gaps between concrete slabs, use self-leveling sealant. If you’re filling jagged concrete cracks and you’re more concerned with durability than appearance, use self-leveling sealant. If you’re more interested in the filler blending seamlessly into the slab and don’t mind patching a few cracks down the line, use a concrete patch compound instead.
How do you permanently fix cracks in concrete?
Concrete is absorbent, and cracks are often caused by moisture problems. If you don’t prevent moisture penetration, your concrete will continue to shift and crack over time even after you’ve patched it. So first, you’ll need to locate the source of the water issue. Does water pool up on top and/or on the sides of the slab without draining away? You likely have a drainage problem. In some areas, the soil just naturally holds on to a lot of moisture, like clay. Concrete slabs placed on clay are not a good idea, unless there are protective measures put in place like compacting the clay first and installing a solid stone base below the concrete.
How do you fill deep cracks in concrete?
Shove backer rod down into the cracks to provide a barrier for your crack filler to rest on. For narrow but deep cracks that won’t fit backer rod, sift sand into the crack until it no longer falls down. At that point, the deep part of the crack is filled and you can apply filler to the top of the crack without it falling down.
How do you fill hairline cracks in concrete?
Apply concrete patch compound to the crack with a small plastic putty knife. Press the compound into the crack, and remove excess from the surface by running your putty knife across the top, perpendicular to the crack. To further blend the patch into the surrounding concrete, take a dry paint brush and run it back and forth perpendicularly over the crack, feathering out the patching compound. If your concrete is textured in one direction, run the brush over the crack in that direction to also feather the compound into the texture. Once dry, you can sand the patch with 60 grit sandpaper if it looks noticeably rougher than the surrounding surface.

I hope this helps you find the right solution for your own concrete crack problems! If you’d like to learn more about how to DIY and fix up your home, check out my course DIY Renovation for Beginners.

Can you pour a layer of the liquid self-leveling compound over these products to make the garage floor seem like one unified piece?
Yes you could, but self-leveling concrete doesn’t have any flex to it, so if your concrete continues to crack due to underlying issues, so will the self-leveling concrete layer on top.
Got it, thank you for replying! 🙂
Your post is a great guide for addressing different types of concrete cracks, with clear and practical advice. Especially appreciate the emphasis on moisture control, as it can be an important step many people overlook. Adding tips like using tinted repair caulk for a balance of durability and looks or sealing concrete after repairs to prevent future issues could further enhance your guide. Great work!
Great article, and with a video as well as pictures! That’s the way to do it to get the full grasp of the different techniques in fixing those pesky concrete cracks, thanks for the share!