
Did you know that you can make non-stainable fillers like Bondo and caulk look like real wood—and that you can even STAIN them? I’ll show you how to use all of the tricks of faux bois to make your project look clean and seamless.

Project supply list
This post may include affiliate links, which means I may earn a small commission if you click on the link and/or purchase from that site. I use that money to keep this blog running. You can read my full disclosure policy here.
- Compressed air (optional)
- Tack cloth (optional)
- Carving tools for wood grain (optional)
- Light liquid wood OR dark liquid wood
- Small paintbrush set
- Non-penetrating stain
- Staining sponges (optional)
- Sealant like spray enamel or polycrylic
Step 1: Prep your surface

If you’re using a sandable filler like Bondo or Durham’s Water Putty, be sure to sand it flush to the surface of the surrounding wood. If desired, you can use carving tools to create wood grain in your filler and mimic the texture of adjacent material. Thoroughly remove loose particles with a stiff brush or compressed air, and dust with a tack cloth to prep your filler for Step 2.
If you’re using caulk, be sure that it’s paintable caulk. This hack will not work with non-paintable caulks like silicone. To prep your caulk for Step 2, make sure that it’s dry and clear of dust using a tack cloth or compressed air.
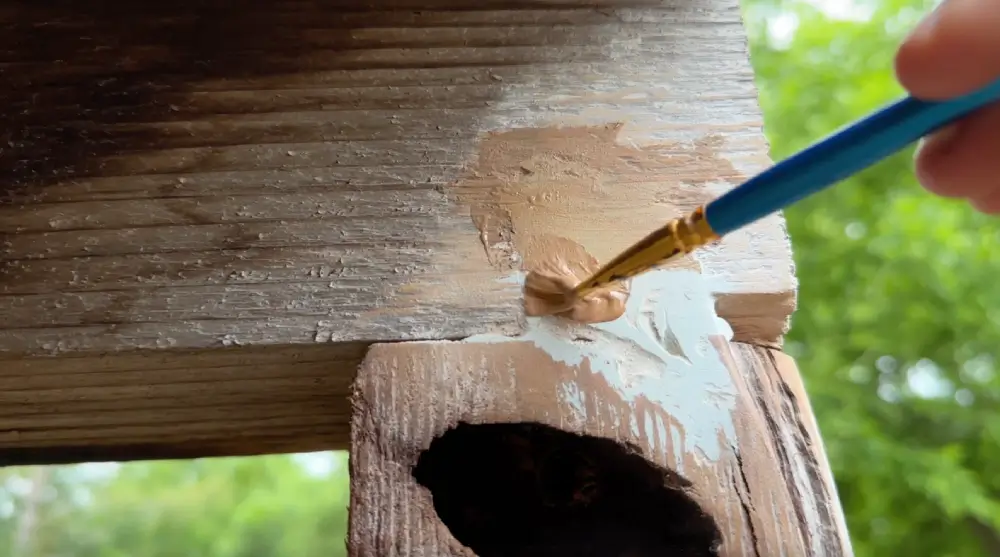
Step 2: Paint on liquid wood

Once your surface is clean, you’re ready to apply the liquid wood. This is the product that makes this whole process possible. Essentially, it’s a mixture with suspended wood particles that you can paint on to almost any surface. When the liquid evaporates, it leaves behind the wood particles, and you can stain them just like solid wood.
If the wood you want to match is on the lighter side like unstained white oak or maple, use light liquid wood. If it’s on the darker side like walnut or a darkly stained wood, use dark liquid wood. The wood particles tend to separate from the bonding liquid as the product sits, so be sure to stir the liquid wood thoroughly before applying it.
Apply with a small paintbrush to your filler or caulk. It may require two coats to get solid coverage. You can sand lightly with 320 grit sandpaper in between if you want a super smooth finish.
Step 3: Stain liquid wood

Be aware that liquid wood cannot be stained with penetrating stains, which are often oil-based. An exception to this is gel stains, which are oil-based but non-penetrating. You can use a gel stain or a non-penetrating water-based stain—for the latter, I prefer this brand.

For your first coat of stain, apply it with a paintbrush to the liquid wood area. To help disguise your filler, you can use a staining sponge to blend the stain out into the surrounding wood to make the patched area less obvious. Then apply your second coat just to the patched area to ensure you get enough color coverage. If you’ve ever applied concealer to a pimple, the concept is pretty much the same: You want full coverage on the spot while seamlessly blending it into its surroundings.
Step 4: Seal liquid wood

Once dry, liquid wood doesn’t rub off easily, but it’s still not super durable. Especially if your patch is outside, in a high traffic area, or in an area that needs to be cleaned frequently, you’ll want to seal it. You can use any kind of sealant for this.
For ease on my outdoor project, I used a clear spray paint enamel. But inside, I’d suggest using a mild water-based sealant like polycrylic that won’t yellow or darken with time and change the color of your patch. Be sure to pick a sheen that matches your surrounding wood, and test it first to make sure it’s accurate. I find that Minwax polycrylic sheens are much shinier than I’d expect. Matte looks like satin to me. So if you want a true flat finish, I recommend this dead flat topcoat instead.
Step 5: Step back and admire

It really is that simple to make non-wood fillers look like real wood. And in fact, because you’re using liquid wood, the fillers are partially wood now, too!
If you want to learn how to faux bois more surfaces and even create wood grain on doors to make them look like solid wood, check out the Faux Bois lesson in my course DIY Renovation for Beginners.
