
My parents’ back porch on their new home had an overhang with sinking posts. Whoever placed the posts didn’t pour concrete footings under them. Instead, they just placed them on top of patio pavers and hoped for the best. Yikes!


The result? The patio posts started sinking and in some cases even broke the pavers. So to kick off their back porch DIY renovation, I knew that I needed to make the overhang structurally sound first. Since I didn’t want to tear it down and start from scratch, I had to figure out how to retrofit concrete footings for the posts…

Project supply list
This post may include affiliate links, which means I may earn a small commission if you click on the link and/or purchase from that site. I use that money to keep this blog running. You can read my full disclosure policy here.
- Laser measure
- Miter saw
- Pressure-treated 2x4s
- Mallet
- Impact driver
- Drill
- Shovel
- Work gloves
- Concrete form
- Level
- Plumb bob
- Gravel
- Fast-setting concrete
- Rebar
- Anchor bolts
- Post brackets
- Bracket washers
- Bracket screws
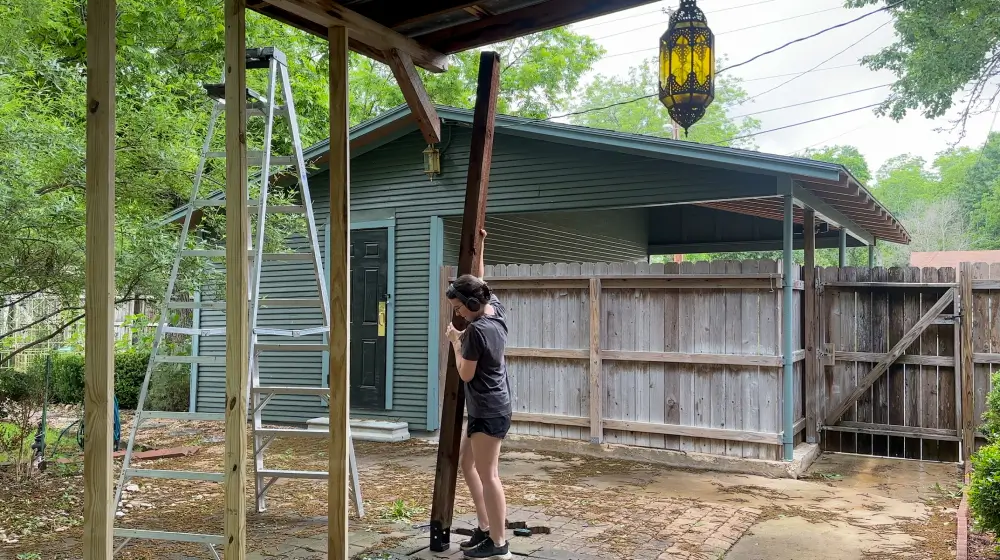
Step 1: Install temporary supports

To get started, I used a laser measure to determine the distance from the ground to the bottom of the overhang that rests on the top of the posts. I then cut some pressure-treated 2x4s to this length and hammered them into place using a rubber mallet.

This should be a tight fit so that the 2x4s start bearing the weight of the overhang and taking the load off the posts. It’s always best to cut long and then make what I call “tiny shaves” on the miter saw until the fit is just right. If you accidentally cut the post too short, you can hammer in a thick nail wedged between the top of the support and the overhang or between the bottom of the support and the ground to serve as a shim.

Use a level to make sure each support is straight—you don’t want it slipping out from under the overhang later because you left it crooked!
And finally, install at least as many temporary supports as you have permanent supports you’re removing. For example, I had three 4×4 posts, so I used six 2×4 temporary supports to compensate. By the time I got all of them wedged in place, they were fully bearing the weight of the overhang and had lifted all three posts slightly off the ground. This also made them much easier to remove later.
Step 2: Remove your first post

First, mark where the base of your post hits the ground so that you know where to lay your concrete footing. If you forget this step, you can always use a plumb bob to determine the center point of the footing hole you need to dig, but it’s easiest to mark it before you remove the post.

Hopefully, your post is just held on by screws that are easily accessible with an impact driver. Unfortunately, my posts were installed before the overhang roof, so some of the screws were no longer accessible, even with a right-angle drill. I ended up having to take a large drill bit and excavating the screws out of the posts. You can use this method as a last resort and then patch the holes later.
Step 3: Dig your footing

Once you remove your post, it’s time to start digging. You should always check with local codes first to determine how deep you need to dig your footings. Often, it’s at least 3 to 4 inches below your area’s frost line. If it’s deeper than 18 inches, you’ll also need to have someone come out and mark your utility lines first so that you don’t hit them accidentally.
Where we live in Texas, there is no frost line, so I simply dug my holes 12 inches deep and about 14 inches wide. I was able to do this with a simple shovel, but if you’re digging much deeper, you will likely need to rent an auger.

Once my hole was dug, I cut a 12 x 48 inch concrete form tube to length, placed it inside, and checked it for level. Then I compacted dirt around the outside of the form edges to lock it in position.

I set the top of my concrete form tube to the top of the hole, flush with the ground. This allowed me to replace the pavers I removed to dig my hole and create a seamless finish later. If you want to disguise the top of your own footing later on and you don’t have pavers, you can set the tube flush with the surface of the ground and cover the footing in gravel, or you can have your tube rise a few inches or even a foot above the ground if you like the look of the exposed concrete footing. To get that look, just trim off the tube casing with a utility knife after the footing has set to expose the concrete.
Step 4: Pour your concrete

Concrete is porous and absorbs water, which can lead to cracking. To prevent that, make sure that your concrete isn’t making direct contact with the soil underneath. Instead, pour in a few inches of gravel to the bottom of your hole to provide a barrier with good drainage. It’s a good idea to compact this gravel as well. I just stepped inside and scooted my feet around a bit.
Then, it’s time to pour in your concrete mix. You can do this the difficult way and get a wheelbarrow and combine concrete mix and water together, or you can do this the easy way with fast-setting concrete. I definitely recommend the latter option.

To do this, pour in Quikrete Fast-Setting concrete mix straight from the bag. It’s a dry, powdery mix with gravel already blended in to help the water you add later mix in. For my 12 inch footings with a few inches of gravel at the bottom, I still needed a little over one bag per footing, so plan accordingly. If your hole is very deep and requires several bags, you may need to pour and set your Quikrete in multiple rounds. Refer to the instructions on your bag.
Step 5: Add rebar and anchor bolt

After I poured the dry mix in, I added in three 12-inch long pieces of rebar around the sides of the footing to reinforce the concrete. You should be able to shove them down through the dry mix, but if there’s a lot of resistance, use a mallet to help sink them in. It’s important to add the rebar after pouring the dry mix because if you reverse the steps, it may pour unevenly and leave air pockets around the rebar, which compromises the integrity of your footing.

Then I added an anchor bolt in the center of the footing. The L-shaped part of the bolt goes into the footing, and the threaded part sticks out. I needed this part to bolt on my post anchor hardware later. To determine how much of the bolt should stick out, I dry fit the post anchor hardware to get the right depth.

Once you have your rebar and bolt in position, it’s time to add water to your mixture. Follow the instructions on your bag for how much water to add. Typically, this is 1 gallon of water per 1 bag of Quikrete Fast-Setting concrete mix. Don’t think you’ll be able to pour all of this in at once. The water will need time to seep through the dry mix, so wait for it to soak in before adding the rest of the water.

Periodically re-check the position and height of your anchor bolt because it will often shift during this process as the concrete settles. This is fast-setting concrete mix, so be sure to make these adjustments before it hardens up. Don’t worry about keeping the bolt perfectly level if you’re using the same anchor hardware I did, as it allows for a little bit of tilt and off-centeredness.
Step 6: Reinstall your post

Attach your post anchor hardware. The Simpson Strong Tie I used allows for a little bit of wiggle room back and forth if your anchor bolt isn’t completely center. To check that your hardware is centered before you tighten it down, you can check with your plumb bob again.


I like the Strong Tie because it lifts the post off the ground by about an inch, preventing water contact and prolonging the life of your post. But as a result, you’ll need to shorten your post accordingly. You can use your laser measure to get the exact length. Again, I recommend cutting a little long and making tiny shaves until it’s just the right fit to avoid cutting your post too short. I also recommend cutting your post on the bottom end so that all of your screw holes on the top of the post still align perfectly.


Once you fit your shortened post back in place, fasten the screws that you removed in Step 2. If you had to excavate screws to start, you may need to make a new screw hole or two to ensure the post still has enough fasteners. Use exterior coated screws throughout, replacing old screws as needed. I recommend using star-drive (aka Torx) screws because they’re easier to drive and less likely to experience cam out.

Then you’ll need to screw in the post to the anchor for security. Note that you’ll need to buy the fasteners and washers for the Simpson Strong Tie separately.
Step 7: Rinse and repeat

With your first footing installed, you can now move on to your next post, repeating Steps 1 through 6. Technically, you could remove all of the posts at once if you have enough temporary supports in place. This would be especially helpful if you’ve rented an auger and need to drill all of the holes in one day, or if you have someone helping you with this project.
But for me, one footing per day was enough to tire me out, and I preferred the idea of having the other two posts still in place while I worked under the overhang for a little extra security.
Step 8: Remove the temporary supports

Once the job is done, use your rubber mallet to pop out the temporary supports. It’s easiest to remove them if you hit them at the bottom or the top of the support, rather than in the middle. It’s physics!
Step 9: Enjoy the peace of mind


Step back and pat yourself on the back. Your posts are now secure!
How deep do concrete footings need to be?
Always check with your local building codes to determine how deep you need to dig holes for footings. Generally, it’s at least 3–4 inches below your area’s frost line. If you’re digging below 18 inches, you’ll need to have utility locators come out and mark your utility lines to ensure that you don’t accidentally hit anything that’s buried.
Do you put gravel under footings?
Yes, I recommend adding at least a few inches of gravel at the bottom of your footings, if not more. Be sure to compact it to improve the forming of the footings. Otherwise, concrete is porous and will absorb water and crack. Gravel will prevent your concrete from making direct concrete with the wet soil, prolonging the life of your concrete.
Can I mix my own concrete for footings?
Yes, you can either rent a cement mixer or if you’re working with a smaller amount or in batches, mix it up in a wheelbarrow. But I prefer using fast-setting concrete, which you pour in dry and add water on top—no mixing required. It makes things much simpler and less messy.
Can I use Quikrete for footings?
Yes, in fact, I recommend using Quikrete Fast-Setting concrete mix for footings. Because you can pour it in dry and add water later without needing to mix, it makes things much simpler.
Is fast-setting Quikrete as strong as regular concrete?
Yes! The initial strength of fast-setting concrete may be lower than that of regular concrete, but after the appropriate cure time, they have comparable strength. Be sure to follow the recommended amounts of water to add to the fast-setting concrete mix, as both too much and too little water can compromise the strength of your concrete.

Want to learn more about DIY renovation? Check out my online course DIY Renovation for Beginners.
